


The Polishing Process
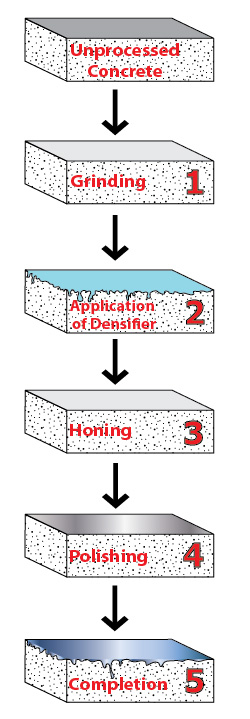 | UNPROCESSED CONCRETE: Unpolished, or unprocessed, concrete often has some type of topical coating (epoxies, for instance) or adhesive (carpet adhesive, black mastic, etc.) present that will have to be removed by using a prep-style abrasive prior to using the BevelKut™ Diamonds (see the Diamonds and Abrasives portion of this catalog). The polishing process includes five specific steps. |
| 1) GRINDING: Begin the concrete polishing process by equipping your grinder with BevelKut™ Diamonds. The first step of the process involves grinding the concrete with BevelKut™ grits 30, 70 and 120. Continue with 50, 100 and 200 grit resin pad. | |
| 2) APPLICATION OF STAINS AND DENSIFIER: After using the 200-grit resin, you can apply any dyes or stains to the concrete. If needed, apply a concrete densifier. | |
| 3) HONING: Continue the polishing process with 400-grit resin. During this step of the process, the concrete will start to shine. The brightness or clarity of the sheen will vary, depending on the resin grit you chose. | |
| 4) POLISHING: Continue and finish the polishing process of the concrete with resin grits 800, 1,500 and 3,000. Each of the final resin processes will depend on the shine and reflection that you are seeing on the concrete surface. If you continue through the 3,000–grit resin, your concrete should have a mirror-like finish that almost resembles the look of glass. | |
| 5) COMPLETION: It is recommended to use a burnishing pad after all of the polishing steps are completed. This will eventually finish the concrete cleaning process and give your new polished floor its ultimate shine. |